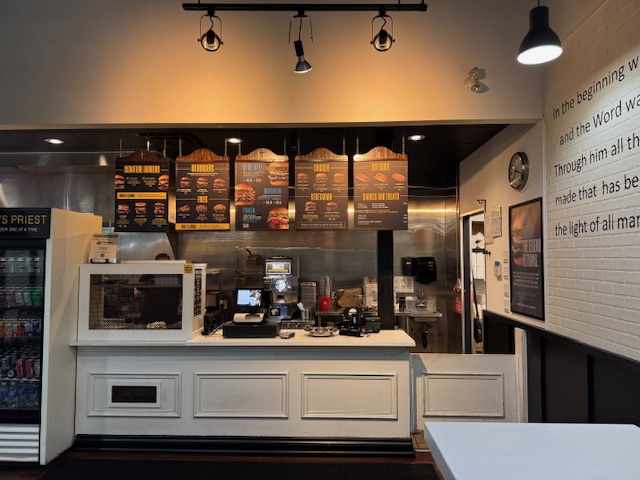
Discovering the Charm of Java Gems Get Stuffed Restaurant and the Iron Lady Saloon.

Discovering the Charm of Java Gems Get Stuffed Restaurant and the Iron Lady Saloon.

Nestled in the heart of our vibrant community are two distinctive gems that offer more than just a dining experience—they provide a journey into delightful culinary adventures and historical ambiance. Welcome to Java Gems Get Stuffed Restaurant and the Iron Lady Saloon, where every visit is a story waiting to be told.

Java Gems Get Stuffed Restaurant: A Culinary Wonderland

Java Gems Get Stuffed Restaurant, fondly known to locals as “Java Gems,” is a beacon of comfort and creativity. As soon as you step through its doors, the inviting aroma of freshly brewed coffee and the mouthwatering scent of home-cooked meals welcome you.

The interior is a harmonious blend of rustic charm and modern elegance, with cozy seating arrangements that make you feel right at home. The walls are adorned with local artwork, creating an atmosphere that is both relaxed and inspiring.

Java Gems prides itself on a menu that caters to diverse tastes and preferences. Their breakfast offerings are legendary, from fluffy pancakes and perfectly scrambled eggs to their signature stuffed French toast, which is a sweet indulgence filled with seasonal fruits and cream cheese. For lunch, the options range from hearty sandwiches and fresh salads to gourmet burgers that are as visually appealing as they are delicious.

One of the standout features of Java Gems is their commitment to using locally sourced ingredients. This not only ensures the freshness of every dish but also supports local farmers and producers. Their coffee, sourced from nearby plantations, is a testament to their dedication to quality and sustainability.

The Iron Lady Saloon: A Step Back in Time

A short stroll from Java Gems leads you to the Iron Lady Saloon, a place where history and hospitality blend seamlessly. The saloon’s name pays homage to the town’s storied past and the strong, resilient women who helped shape it. As you walk in, the rich, warm tones of polished wood and the soft glow of vintage lighting transport you to a bygone era.

The Iron Lady Saloon is renowned for its extensive collection of craft beers and fine spirits. Whether you’re a beer enthusiast eager to try the latest local brew or a connoisseur of aged whiskey, the saloon’s knowledgeable bartenders are always ready to guide you through their impressive selection.

The menu at the Iron Lady Saloon is a tribute to traditional pub fare with a gourmet twist. Their savory pies, succulent steaks, and innovative appetizers are all designed to complement the robust flavors of their drinks. One must-try dish is the “Iron Lady Special” – a perfectly grilled steak topped with a secret sauce that has been a closely guarded recipe for generations.

Live music is a staple at the Iron Lady, with local bands and solo artists frequently taking the stage. The saloon’s atmosphere on a music night is electric, with patrons tapping their feet and singing along to classic tunes.

A Perfect Pairing

What makes Java Gems Get Stuffed Restaurant and the Iron Lady Saloon truly special is the sense of community they foster. Both establishments are family-owned, and their owners share a passion for creating spaces where people can come together to enjoy good food, great drinks, and even better company.

Many visitors start their day with a hearty breakfast at Java Gems, spend the afternoon exploring the charming town, and then unwind in the evening with a drink and live music at the Iron Lady. This perfect pairing offers a full day of delightful experiences that showcase the best of what our community has to offer.

In conclusion, Java Gems Get Stuffed Restaurant and the Iron Lady Saloon are more than just places to eat and drink—they are destinations that capture the essence of our town’s hospitality and charm. Whether you are a local or a visitor, these two gems promise an experience that is both memorable and heartwarming. So come, indulge in the culinary wonders of Java Gems and the historical allure of the Iron Lady Saloon, and make your own story in these beloved establishments.

By #FoodEdmontonDining foodedmonton.com

La Morenita Restaurant a delightful experience overall.

My seniors group and I recently visited La Morenita Restaurant and had a delightful experience overall. The ambiance was warm, welcoming, and very colorful, making it a perfect spot for a delicious meal.

We decided to try their tacos, and found them to be pleasantly tasty. Each bite was bursting with flavor, and the ingredients were clearly fresh and well-prepared. However, the portion size could be increased a bit. The pop was quite flavorable, which added to an enjoyable meal.

The Flan and Strawberry cake was heavenly. The flan was creamy and rich, with just the right amount of sweetness, while the icing of the cake was perfectly done. The Strawberry was so tasty on the inside. These desserts were so delicious that we all felt transported to heaven with every bite.

Overall, La Morenita Restaurant offers a wonderful dining experience with some fantastic flavors. The desserts alone are worth a visit! for a Group of nine people, the total bill came to around $280.00

By #DataDiggerDon and #FoodeEdmontonDining

Don’s Pickled Beets Recipe.

Don’s Pickled Beets Recipe

Ingredients:

  • 2 pounds beets
  • 1 cup apple cider vinegar
  • 1 cup water
  • 1 cup sugar
  • 1 teaspoon salt
  • 1 cinnamon stick
  • 4 whole cloves
  • 1 bay leaf Instructions:
  1. Prepare the Beets:
  • Rinse the beets thoroughly under cold water to remove any dirt.
  • Trim the stems and roots, but leave about an inch of the stem attached to prevent bleeding.
  • Place the beets in a large pot and cover them with water. Bring to a boil, then reduce the heat and simmer for
    about 30-40 minutes, or until the beets are tender when pierced with a fork.
  • Drain the beets and let them cool. Once cool enough to handle, peel the skins off (they should slip off easily).
  1. Slice the Beets:
  • Slice the peeled beets into 1/4-inch thick rounds or wedges, depending on your preference.
  1. Prepare the Pickling Brine:
  • In a medium saucepan, combine the apple cider vinegar, water, sugar, and salt. Add the cinnamon stick,
    whole cloves, and bay leaf.
  • Bring the mixture to a boil, stirring until the sugar and salt are dissolved. Remove from heat.
  1. Pickle the Beets:
  • Pack the sliced beets into sterilized jars.
  • Pour the hot brine over the beets, ensuring they are completely covered. Leave about 1/2 inch of headspace at
    the top of the jars.
  • Seal the jars with sterilized lids and bands.
  1. Process the Jars:
  • If you plan to store the pickled beets at room temperature, process the jars in a boiling water bath for
    10 minutes to ensure they are properly sealed.
  • If you prefer to store them in the refrigerator, you can skip the water bath canning process.
    Let the jars cool to room temperature, then refrigerate.
  1. Let Them Pickle:
  • Allow the beets to pickle for at least 1-week before consuming for the best flavor.
    They will continue to improve in flavor over the next few weeks.
  1. Enjoy:
  • Serve your pickled beets as a side dish, in salads, or as a tangy addition to sandwiches and other dishes.

These pickled beets can be stored in the refrigerator for up to 3 months. Enjoy your homemade pickled beets!

Brought to you by The BBQ KING at bbqsecrets.ca and FoodEdmonton.com

I Recently Had The Pleasure Of Dining At Century Casino

I recently had the pleasure of dining at Century Casino and was fortunate enough to be served by Candice.

From the moment I walked in, Candice’s warm and welcoming smile set the tone for an exceptional dining experience.

Candice’s professionalism and attention to detail are truly unparalleled. She possesses a unique ability to anticipate her guests’ needs, ensuring that every request is met promptly and with a genuine eagerness to please. Her knowledge of the menu was impressive, and her recommendations were spot on, elevating our meal to an unforgettable culinary delight.

What stood out the most was Candice’s personable nature and her ability to make every guest feel special. She engages with customers with genuine interest, making each person feel like they are the most important guest in the room. Her friendly demeanor and impeccable service made the entire dining experience not just enjoyable, but memorable.

In a world where good service is becoming a rarity, Candice is a shining example of what true hospitality should be. Century Casino is incredibly lucky to have her on their team. I will undoubtedly return and hope to be served by Candice again. She truly made my visit a wonderful one. Highly recommended!

Brought to you by Food Edmonton and #DataDiggerDon

If you would like to share a few comments about this article just send to donr555@gmail.com

To write a review for the author just do a Google search for “Data Digger Don”. Thank you

BBQ Pork Burgers

TOM BRADY BBQ PORK BURGER.

Here’s a delicious recipe for BBQ Pork Burgers:

BBQ Pork Burgers

Ingredients:

  • For the burgers:
  • 1 pound ground pork
  • 1/2 cup breadcrumbs
  • 1/4 cup barbecue sauce (your favorite brand)
  • 1 egg
  • 1/4 cup finely chopped onion
  • 2 cloves garlic, minced
  • 1 tablespoon Worcestershire sauce
  • 1 teaspoon smoked paprika
  • 1 teaspoon salt
  • 1/2 teaspoon black pepper
  • For the BBQ sauce:
  • 1 cup barbecue sauce
  • 2 tablespoons honey
  • 1 tablespoon apple cider vinegar
  • 1 teaspoon smoked paprika
  • For serving:
  • Burger buns
  • Coleslaw (optional)
  • Pickles (optional)
  • Extra BBQ sauce
  • Lettuce, tomato, and onion slices (optional)

Instructions:

  1. Prepare the Burger Patties:
  2. In a large bowl, combine the ground pork, breadcrumbs, barbecue sauce, egg, chopped onion, minced garlic, Worcestershire sauce, smoked paprika, salt, and black pepper.
  3. Mix until all ingredients are well combined. Be careful not to overmix, as this can make the burgers tough.
  4. Divide the mixture into 4 equal portions and shape them into patties.
  5. Cook the Burger Patties:
  6. Preheat your grill to medium-high heat (about 375-400°F) or heat a grill pan over medium-high heat.
  7. Lightly oil the grill grates or grill pan.
  8. Grill the patties for about 5-6 minutes per side, or until they reach an internal temperature of 160°F (71°C). This ensures the pork is fully cooked.
  9. During the last minute of cooking, brush the tops of the patties with a little extra BBQ sauce.
  10. Prepare the BBQ Sauce:
  11. In a small saucepan, combine the barbecue sauce, honey, apple cider vinegar, and smoked paprika.
  12. Heat over medium-low heat, stirring occasionally, until the sauce is warmed through and well combined. This will take about 5 minutes.
  13. Assemble the Burgers:
  14. Toast the burger buns on the grill for about 1-2 minutes, or until lightly browned.
  15. Place a pork patty on the bottom half of each bun.
  16. Top with additional BBQ sauce, coleslaw, pickles, and any other desired toppings such as lettuce, tomato, and onion.
  17. Place the top half of the bun on the burger.
  18. Serve:
  • Serve the BBQ Pork Burgers immediately with your favorite sides such as fries, chips, or a side salad.

Enjoy your BBQ Pork Burgers!

Brought to you by The BBQ KING
You’ll be a big hit at your next BBQ party
with these tasty burgers.

https://www.bbqsecrets.ca/bbq-pork-burgers/

How to carve a turkey properly.

Carving a turkey properly is a skill that can make a big difference in presentation and taste. Here’s a step-by-step guide to carving a turkey:

  1. Prepare the Tools: You’ll need a sharp carving knife, a carving fork, a cutting board, and a serving platter.
  2. Let it Rest: After removing the turkey from the oven, let it rest on a cutting board for about 15-20 minutes. This allows the juices to redistribute, making the meat juicier and easier to carve.
  3. Remove the Legs and Thighs: Start by cutting through the skin between the breast and the thigh. Pull the leg away from the body until the joint pops out, then use your knife to cut through the joint. Repeat on the other side.
  4. Separate the Thigh from the Drumstick: Locate the joint between the thigh and the drumstick and cut through it.
  5. Slice the Breast Meat: Make a horizontal cut along the bottom of the breast where it meets the body. Then, make vertical slices downward from the top of the breast, parallel to the breastbone. Continue slicing until you’ve removed all the breast meat from one side of the turkey.
  6. Repeat on the Other Side: Turn the turkey around and repeat the slicing process on the other side of the breast.
  7. Remove the Wings: Pull each wing away from the body until you can see the joint, then cut through it to remove the wing.
  8. Serve: Arrange the carved turkey pieces on a serving platter, and you’re ready to serve!

Remember, practice makes perfect when it comes to carving a turkey. Don’t worry if your first attempt isn’t perfect—it’s all about enjoying the process and the delicious end result!

5 kidney lemon-friendly recipes.

5 kidney lemon-friendly recipes.

It’s important to note that while lemons can add flavor to dishes, they may not be suitable for everyone with kidney issues, as they contain citric acid. Individuals with kidney problems should consult their healthcare provider or a registered dietitian for personalized dietary advice. That said, here are five kidney-friendly recipes that incorporate lemons in moderation:

  1. Lemon Herb Grilled Chicken:
  • Ingredients:
    • Chicken breasts
    • Lemon juice
    • Olive oil
    • Fresh herbs (such as thyme, rosemary, or oregano)
    • Garlic, minced
    • Salt and pepper to taste
  • Instructions:
    • In a bowl, mix lemon juice, olive oil, minced garlic, chopped fresh herbs, salt, and pepper to create a marinade.
    • Marinate chicken breasts in the mixture for at least 30 minutes.
    • Grill the chicken until fully cooked.
  1. Lemon Dill Salmon:
  • Ingredients:
    • Salmon fillets
    • Lemon zest
    • Fresh dill, chopped
    • Olive oil
    • Salt and pepper
  • Instructions:
    • Preheat the oven to 375°F (190°C).
    • Place salmon fillets on a baking sheet.
    • In a bowl, mix lemon zest, chopped dill, olive oil, salt, and pepper. Spread the mixture over the salmon.
    • Bake until the salmon flakes easily with a fork.
  1. Lemon Garlic Roasted Vegetables:
  • Ingredients:
    • Assorted vegetables (such as carrots, zucchini, and bell peppers)
    • Lemon juice
    • Olive oil
    • Garlic, minced
    • Italian seasoning
    • Salt and pepper
  • Instructions:
    • Preheat the oven to 400°F (200°C).
    • Cut vegetables into bite-sized pieces and place them on a baking sheet.
    • In a bowl, mix lemon juice, olive oil, minced garlic, Italian seasoning, salt, and pepper. Drizzle over the vegetables.
    • Roast until the vegetables are tender.
  1. Quinoa Salad with Lemon Vinaigrette:
  • Ingredients:
    • Cooked quinoa
    • Cherry tomatoes, halved
    • Cucumber, diced
    • Red onion, finely chopped
    • Feta cheese, crumbled
    • Fresh parsley, chopped
  • Lemon Vinaigrette:
    • Lemon juice
    • Olive oil
    • Dijon mustard
    • Salt and pepper
  • Instructions:
    • In a large bowl, combine cooked quinoa, cherry tomatoes, cucumber, red onion, feta cheese, and parsley.
    • In a separate bowl, whisk together lemon juice, olive oil, Dijon mustard, salt, and pepper to make the vinaigrette.
    • Pour the vinaigrette over the quinoa salad and toss gently.
  1. Lemon Berry Sorbet:
  • Ingredients:
    • Mixed berries (such as blueberries, strawberries, and raspberries)
    • Lemon juice
    • Honey or agave syrup (optional)
  • Instructions:
    • Blend mixed berries with lemon juice in a blender until smooth.
    • Taste and add honey or agave syrup if desired.
    • Pour the mixture into an ice cream maker and churn according to the manufacturer’s instructions to make a refreshing sorbet.

Remember to consult with a healthcare professional or a dietitian to ensure these recipes align with your specific dietary needs and restrictions.

These tasty recipe ideas are Brought to you by #foodedmontondining at foodedmonton.com

Seven reasons why Turkey is the healthiest choice of meat.

It’s important to note that the perceived healthiness of a particular meat can depend on various factors, including preparation methods and individual dietary needs. However, here are seven reasons why some people may consider turkey a relatively healthy choice of meat:

  1. Lean Protein: Turkey is a good source of lean protein, which is essential for muscle growth, repair, and overall body function. It provides a substantial amount of protein with less fat compared to some other meats, making it a suitable option for those looking to manage their weight or maintain a healthy diet.
  2. Low in Saturated Fat: Turkey is generally lower in saturated fat compared to red meats such as beef or lamb. Diets high in saturated fat have been associated with an increased risk of heart disease, so choosing leaner meats like turkey can be a heart-healthy option.
  3. Rich in Nutrients: Turkey is a good source of various essential nutrients, including vitamins B6 and B12, niacin, phosphorus, and selenium. These nutrients play crucial roles in energy metabolism, immune function, and overall health.
  4. Low Calorie Content: Skinless, white meat turkey is relatively low in calories, making it a good choice for those who are conscious of their calorie intake. Removing the skin further reduces the fat content.
  5. Versatile and Flavorful: Turkey is a versatile meat that can be prepared in various ways, providing options for a diverse and balanced diet. Whether roasted, grilled, or ground, turkey can be included in a wide range of dishes.
  6. May Support Weight Management: Due to its lower fat content and relatively high protein content, turkey can contribute to a sense of satiety, potentially helping with weight management by reducing overall calorie intake.
  7. Alternative for Red Meat: Red meats, such as beef and lamb, are associated with certain health concerns when consumed in excess, including an increased risk of certain diseases. Choosing turkey as an alternative to red meat can be part of a balanced diet, providing variety while reducing potential health risks.

It’s important to consider individual dietary needs, preferences, and any health conditions when selecting meat or planning meals. Additionally, the way the meat is prepared, such as cooking methods and seasoning, can impact its overall healthiness.

10 uses for a waffle iron besides making waffles that you never knew about.

10 uses for a waffle iron besides making waffles that you never knew about.

Waffle irons are versatile kitchen appliances that can be used for more than just making waffles. Here are 10 creative uses:

  1. Grilled Cheese Sandwiches: Use the waffle iron to make perfectly crispy grilled cheese sandwiches. Place the sandwich between the waffle iron plates and press until the bread is golden brown and the cheese is melted.
  2. Hash Browns or Tater Tots: Press shredded potatoes or tater tots in the waffle iron to create crispy hash browns. This gives them a unique texture compared to traditional methods.
  3. Cinnamon Rolls: Cook cinnamon roll dough in the waffle iron for a quick and easy alternative to baking. The result is a deliciously crispy, caramelized exterior.
  4. Quesadillas: Make quesadillas by placing tortillas, cheese, and your favorite fillings in the waffle iron. It creates a crunchy, cheesy exterior with a gooey interior.
  5. Brownies or Cookies: Use the waffle iron to make individual portions of brownies or cookies. This method gives them a crisp outer layer while keeping the inside soft.
  6. Falafel or Veggie Patties: Flatten falafel or veggie patties in the waffle iron for a quick and uniform cooking process. This technique provides a nice, crispy texture.
  7. Omelets or Frittatas: Beat eggs and pour them into the waffle iron along with your favorite omelet or frittata ingredients. This creates a convenient, mess-free single-serving breakfast.
  8. Panini-style Sandwiches: Make panini-style sandwiches by pressing your favorite bread and fillings in the waffle iron. It gives sandwiches a unique texture and compresses the ingredients together.
  9. Bacon or Sausage: Cook bacon or sausage in the waffle iron for a quick and easy way to achieve a crispy texture without splattering grease on the stovetop.
  10. Stuffed Waffles: Create stuffed waffles by placing a layer of batter, adding sweet or savory fillings, and then topping with more batter before closing the waffle iron. This results in a waffle with a surprise filling.

Remember to experiment with different recipes and get creative with your waffle iron to discover even more delicious possibilities!

These tasty recipe ideas are Brought to you by #foodedmontondining at foodedmonton.com

Here are five 7-minute easy meal ideas.

Here are five 7-minute easy meal ideas:

  1. Caprese Avocado Toast:
  • Ingredients:
    • 2 slices of whole-grain bread
    • 1 ripe avocado
    • 1 large tomato
    • Fresh mozzarella cheese
    • Balsamic glaze
    • Salt and pepper to taste
  • Instructions:
    1. Toast the bread slices.
    2. Mash the avocado and spread it evenly on the toasted bread.
    3. Slice the tomato and mozzarella, and arrange them on top of the avocado.
    4. Drizzle with balsamic glaze and season with salt and pepper.
  1. Pesto Pasta with Cherry Tomatoes:
  • Ingredients:
    • 1 cup of your favorite pasta
    • 2 tablespoons of pesto sauce
    • Cherry tomatoes, halved
    • Parmesan cheese (optional)
  • Instructions:
    1. Cook the pasta according to package instructions.
    2. In a pan, heat the pesto sauce and cherry tomatoes.
    3. Toss the cooked pasta in the pesto and tomato mixture.
    4. Optional: sprinkle with Parmesan cheese before serving.
  1. Greek Salad Wrap:
  • Ingredients:
    • Whole wheat wrap
    • 1 cup chopped cucumber
    • 1 cup cherry tomatoes, halved
    • Feta cheese, crumbled
    • Kalamata olives, sliced
    • Greek dressing
  • Instructions:
    1. Lay out the whole wheat wrap.
    2. Add cucumber, cherry tomatoes, feta cheese, and olives.
    3. Drizzle with Greek dressing.
    4. Fold the wrap and enjoy.
  1. Quick Stir-Fry with Tofu and Vegetables:
  • Ingredients:
    • 1 cup firm tofu, cubed
    • 2 cups mixed stir-fry vegetables (bell peppers, broccoli, snap peas, carrots)
    • 2 tablespoons soy sauce
    • 1 tablespoon sesame oil
    • 1 clove garlic, minced
    • Cooked rice or noodles
  • Instructions:
    1. In a pan, sauté tofu and vegetables in sesame oil.
    2. Add minced garlic and stir-fry until vegetables are tender.
    3. Pour soy sauce over the mixture and stir well.
    4. Serve over cooked rice or noodles.
  1. Mediterranean Chickpea Salad:
  • Ingredients:
    • 1 can chickpeas, drained and rinsed
    • Cherry tomatoes, halved
    • Cucumber, diced
    • Red onion, finely chopped
    • Feta cheese, crumbled
    • Olive oil and lemon juice dressing
  • Instructions:
    1. Mix chickpeas, cherry tomatoes, cucumber, red onion, and feta cheese in a bowl.
    2. Drizzle with olive oil and lemon juice dressing.
    3. Toss the ingredients together until well combined.

These recipes are designed to be quick and easy, and you can customize them based on your preferences and what you have on hand. Enjoy your meals! These tasty recipe ideas are Brought to you by #foodedmontondining at foodedmonton.com